Showing posts with label Wedding cards & Gifts. Show all posts

Monday, April 18, 2022

Surprise Engagement Party!

I'm too excited! My daughter got engaged on Saturday.  I tell you, it was a chore keeping the surprise from her. Her now Fiance' had a vision of how he wanted to propose. He had an awesome idea along with his Mother and Sister. I chipped in with the marquee lights, party favors and photo frame prop. You know I had a ton of fun because I got to use my long-hoarded crafty supplies! Purple is her favorite color, so we went with that. Everything turned out beautiful! I know my daughter is still walking on clouds. I'm so happy for them and looking forward to helping with the planning of the wedding.

The happy couple in the photo frame prop I made.
Close up
Ring from the Silhouette Store
She said yes!
Paper flowers from the Silhouette Store
Foam board letters with lights
Day time view
Night view

Balloon backdrop by the fiances' sister and mother
Check out the red carpet!
Night view
Party favor basket by yours truly.

What was in the basket
Created with print and cut with my Cameo.

Thank you for stopping by!
~Danita~


Friday, July 2, 2021

Wedding Card

 I was playing around with a file I got last year from Dreaming Tree. This card is for no one in particular but I will have it when the time arises. The heart is a Tim Holtz die named Geo Frames. The embossing was done with the Cuttlebug Regal Braided embossing folder. 


Thank you for stopping by to view my blog. It is appreciated!

~Danita~


Thursday, April 8, 2021

Wedding Card

I was requested to make a wedding card by my cousin. The wedding colors are Forest Green and White. At first, I was like no way, Forest Green for a wedding? Yuk! So we decided to just go with the White and Gold.  

As I was planning out the card a picture popped up on my IG (you know they're listening) of a Forest Green wedding. It was beautiful!!! (picture at the bottom) I decided to go ahead and try to make the card out of Forest Green and Gold.  I must say that I loved how it turned out!

Front

Inside


This is not my picture!!!!
Isn't this wedding picture just gorgeous?
Forest Green and White.


The card base is from Monica's Creative Closet. I enlarged it, deleted some cuts, and added some cuts. I created the side panels in my Silhouette software and did print and cut for the insides. I really hope the couple is pleased as I had so much fun making it.

Have an awesome day!

~Danita~


Sunday, July 21, 2019

Stampin Up Cake Soiree

I just love this stamp set from Stampin Up. I saw an adorable card on Pinterest and knew I had to make my own version. Each flower is stamped and heat embossed. The "Celebrate" tag is Spellbinders Victorian Tag 2.  I used gold foil cardstock for the cake base.

Close up
Close up @

I can't wait to use this stamp set again!  It can be used for birthdays, weddings, anniversaries or any special occasion.

Thank you for stopping by. Have an awesome day!
~Danita~

Wednesday, November 15, 2017

Wedding Card

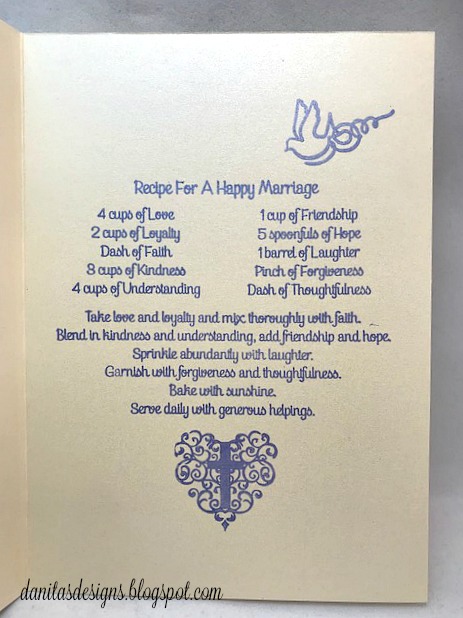
This card was made for my cousin. She recently tied the knot. I chose the colors based on the colors of the wedding, lavender and cream.  The lavender is a very pretty shimmer cardstock. Be sure to see the inside below. It has one of my favorite "recipes".
 Inside

Supplies used: Our Daily Bread - inside sentiment
                         Spellbinders Swirl Bliss Pockets
                         Spellbinders Mystical Embrace
                         Bride and Groom die - un-named die cut

Thanks for stopping by 
and
have an awesome day!
~Danita~

Tuesday, November 7, 2017

Wedding Card


I was invited to a few weddings last month and this sparked me to play around with some dies that I had for quite some time but never really got to use. It took me a few days to figure out what to do with my Spellbinder Shoe dies but I love the way this one turned out.


 Here it is with a black background because I couldn't decide with background I liked the best.


Supplies used: Spellbinders Ladies Shoe
                        Spellbinders Gents Shoe
                        Elizabeth Crafts - Congratualtions
                        Martha Stewart Hearbeat Punch
                        S.E.I White Elegance Cardstock
                        Heart die - Kiwarm

Thanks for stopping by!!!
~Danita~

Friday, June 24, 2016

Congratulations on your Engagement Card

Card Request ~ Creative Card Angels

What a joyous occasion! I enjoyed making this card for the newly engaged couple.

 Inside

Supplies used:  K & Company Smitten paper pack
                          Joy! crafts Doves
                         Nellie's multi-heart frame dies
                         Elizabeth Crafts Congratulations die

Sunday, June 5, 2016

Wedding Card

Card Request ~ Creative card Angels ~ Shabby Chic Wedding Card

Whew boy!!  This one here almost took my breath away!! Fist of all I have never done anything Shabby Chic before, so I had to go to Mr. Google to get some ideas.   The wedding colors are a Pastel Springy type.  I tried to match the card to her colors.

I designed this card from scratch.  It was a process trying to line everything up and cut it just right. A week and a half process at that!!!  (In fairness, I was sick most of that week and a half).

Even though it took me a while to complete. I love the final outcome.  I will make this my go to wedding card since it easily be personalized now that it's done.
 Inside
 Here's a close up. I used the Silhouette Rhinestone feature to create the holes around the heart. Then I popped up the first layer and added another color beneath.
This is her wedding bouquet that I tried to match. Aren't these colors gorgeous?

Have an awesome day!!!!


Thursday, June 2, 2016

Wedding Card and Scrapbook Layouts

My friend recently got married in Hawaii and I, along with a few others, were asked to help make her a wedding scrapbook.  We we given specific topics to focus on, I had Bride & Groom & Celebrations.

This may seem like and easy task to most crafters but I don't Scrapbook!!!  Believe me when I tell you that this was a challenge for me!!!

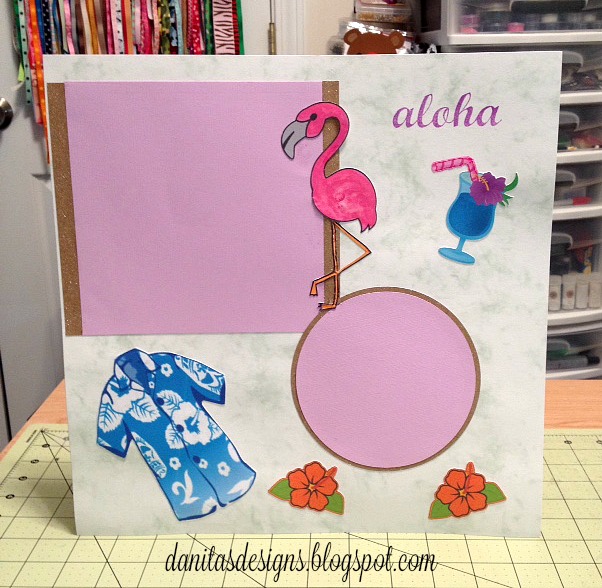
Her wedding colors were Lavender, Gold and White. I tried to incorporate a Tropical Theme on the layouts using these colors.

The wedding card from the Silhouette Design Store.
Inside of the card.

Here's the first layout page.
Bride - Sharon
2nd layout page  The Groom - Kenny
Layout 3
Layout 4
Layout 5
Layout 6
Layout 7
Layout 8

Congratulations to Sharon and Kenny and I hope they enjoy their Wedding Scrapbook.


Friday, July 11, 2014

Biker Wedding Card

This card took me about a week to make, but it was well worth it because it was for two wonderful people. I wanted to be sure to personalize it so that they could have it to keep as a reminder of their special day. I tried match the colors of the wedding, tiffany blue, yellow and silver. My cousin and her new husband are bikers so I wanted to use that on the card also.

I love making things for my family. They really show me much love on my projects. This one was no exception. They loved it!

Here's the front: I used the Anna Griffin flower vine die for the silver flowers, and the Ebosser Regency folder on the yellow background and veil. The bride and groom are two different images I got off the web, colored and welded to make one. Then I did a print and cut on my Cameo. The motorcycle also came off the web. I highlighted the bike's chrome accents with a Wink of Stella Silver Glitter pen( the bottom flower is silver also but I could not get a good picture of it)

Here's the inside. I got the idea for the wedding cake off of Pinterest. I made my own template and embellished with ribbon and vinyl to help give it the appearance of cake layers.

Close up
I just love this #Anna Griffin die!
This is a corner die by Spellbinders.
Another close up shot.
It was a beautiful wedding and I enjoyed it very much. I'm so happy that they loved their wedding keepsake, it was made from my heart!

Thanks for looking and have a wonderful day!

Friday, June 13, 2014

Glass etching with an Air Eraser

Hello all. I hope you're having a wonderful day. This is my Design Team post this month for She's A Sassy Lady.

I will attempt to show you how easy it is to etch glass with an air eraser. It's not hard at all, once you get the hang of it.  Below is just a few of the glasses that I did for my cousin. She and her fiance will be giving these out to the groomsmen, as gifts. #cricut #imadeit
Here's what you need:
1. Air Compressor
2.  Air eraser
3. Aluminum Oxide


Now that you have your supplies, you will need to cut out your pattern on you Die cutting machine. I used my Cameo. I find it best to use vinyl, but some people use clear contact paper. I just can't see what I'm doing with the clear contact paper. You may be able to use a printed or solid contact paper. Play around with it and see what works for you.
  
Once you get the pattern cut out, you will use the negatives and apply to the glasses.
Then you wan to tape off any parts of the glass that you don't want to etch:


 Now here's the setup


You can find list of how to make this homemade cabinet here I got this information from one of the Facebook groups I'm in.  I just decided to change it up a bit and go with the clear plastic instead of the top. I personally think you can see better through the clear plastic. I use clips to hold the plastic in place, or you can use clothes pins. Oh, and you need a face mask for sure. You do not want to breathe in the oxide! I also wear gloves, but many of my friends do not and have had no problems. I also wear goggles.

 I place foil in the bottom of the cabinet to collect my oxide for re-cycling. Yes you can re-cycle, but be weary of debris. 

I used the Paasche Air Eraser kit from Amazon:

Then you fill up the cup on top of the eraser. This is the only frustrating part. The cup is so small, you have to keep filling it up.
*Note this is not my picture, my pictures were lost.


I set my compressor to 75 - 80 PSI.
Then it's time to blast away!!!
It's best to do the erasing in the day time so you can "see" what you have done.
 When finished you want to wash off the excess oxide and remove the tape.
Your vinyl will still be in tack and that's okay. You will began to peel it away once you have all the oxide rinsed off.
End results:


Thanks for looking and I hope I have encouraged you to try Air Erasing, but fair warning....It is addicting!!